


Overview
Tranquilo (pronounced transformer + kilogram, /tɾanˈkilo/) is an open-source static sites manager.
A static sites manager (SSM) deals with the ever growing complexity of web sites by taking a new approach. Instead of considering each site in isolation and offer a set of features that need to be configured each time, manually, Tranquilo considers the sites as a group of services that share a lot of features and tries to streamline those features to manage them in the manager an not in the site.
Tranquilo is aligned, and relies heavily, on Jamstack philosophy, static sites are treated as files and served as such, no server side manipulation or processing at all. It is precisely because of these foundations that you can rest assured that your sites don't need to be static in the sense of lacking interaction.
Inspiration
Over the years I have had often ideas for projects, and requests for very basic sites for friends and family. The problem is that even with such great services as Netlify, all of this sites are not intended to face increasing loads or to have to handle million of requests a second, not even a day. Maybe some of them will in the future, but the cost of planning for that is just too high.
Having to update a dozen sites manually is just boring, even if you consider that after committing the changes it will be picked up by CI and deployed for you automatically. And delegating the support features to third party services is often not scalable in terms of money, since you already know most of these projects won't ever be commercially viable, but that doesn't mean those are not important.
Vision
Now the mapping for domains to content happens in the database and is controlled by javascript code. It is easy to see the endless possibilities here, but I'll share some of the most interesting to me:
Server Side Analytics: This was the reason for me to start considering this project. There are some server side analytics available but those are neither as cheap or as transparent as I would like. I don't expect complex user tracking features for free but I do think some basic page counts, load, and maybe the time at the day at which those happened would be useful.
Flexible Web UI: Since the GraphQL API is generated out-of-the-box it is easy to create clients in any language and framework.
Dynamic mapping: You can control the mapping with a bigger granularity since you will have access to all the properties of the HTTP request to decide what static site to deliver.
Cost Analysis: One of the things I miss the most from existing solutions and I would love to work to solve it in the future is cost analysis, it is often the case that providers have different levels of transparency about their pricing models but even those that are completely transparent upfront do not help you to take an informed decision, because it goes against their marketing strategies, but it shouldn't. I don't think it would be that difficult to come up with some basic linear models, and that would be better than nothing.
Extensibility: It is easy to implement a plugin/middleware model for additional functionality.
Architecture
Tranquilo aims to be a self-contained group of services that you can install in any cloud provider, like Linode, and then use a web interface to control your static sites, currently the web interface is just Hasura Console, but since it provides a fully functional GraphQL API, it will be possible to easily adapt not only one but many clients that use a common interface.
The idea is not to replace existing platforms that host statics sites and offer a myriad of services, each particular for very specific needs, but to offer an alternative for another need. The focus is NOT in the build step, which probably can be done locally most of the time. This post will assume no back-end knowledge and guide you step by step through the first draft of this project. It does not mean you will always have to follow all of this steps to use the project, although at the moment installation is completely manual.
Infrastructure
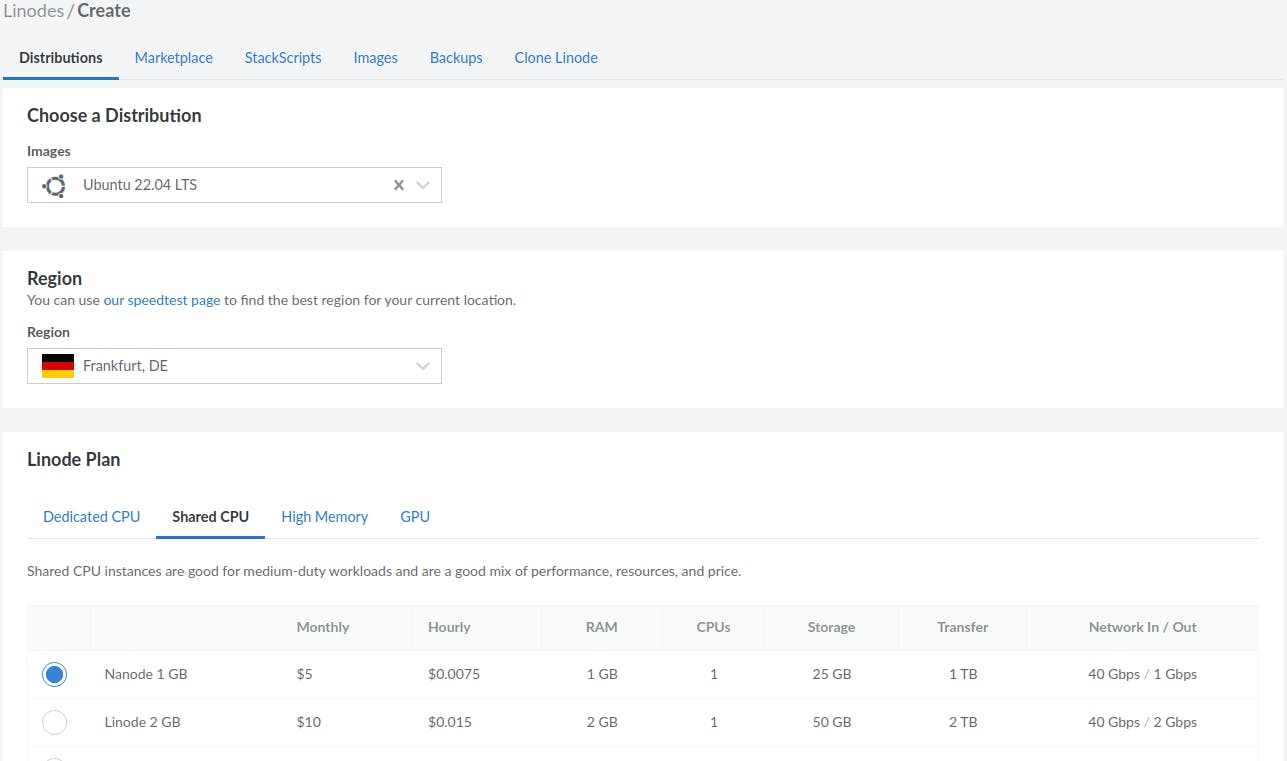
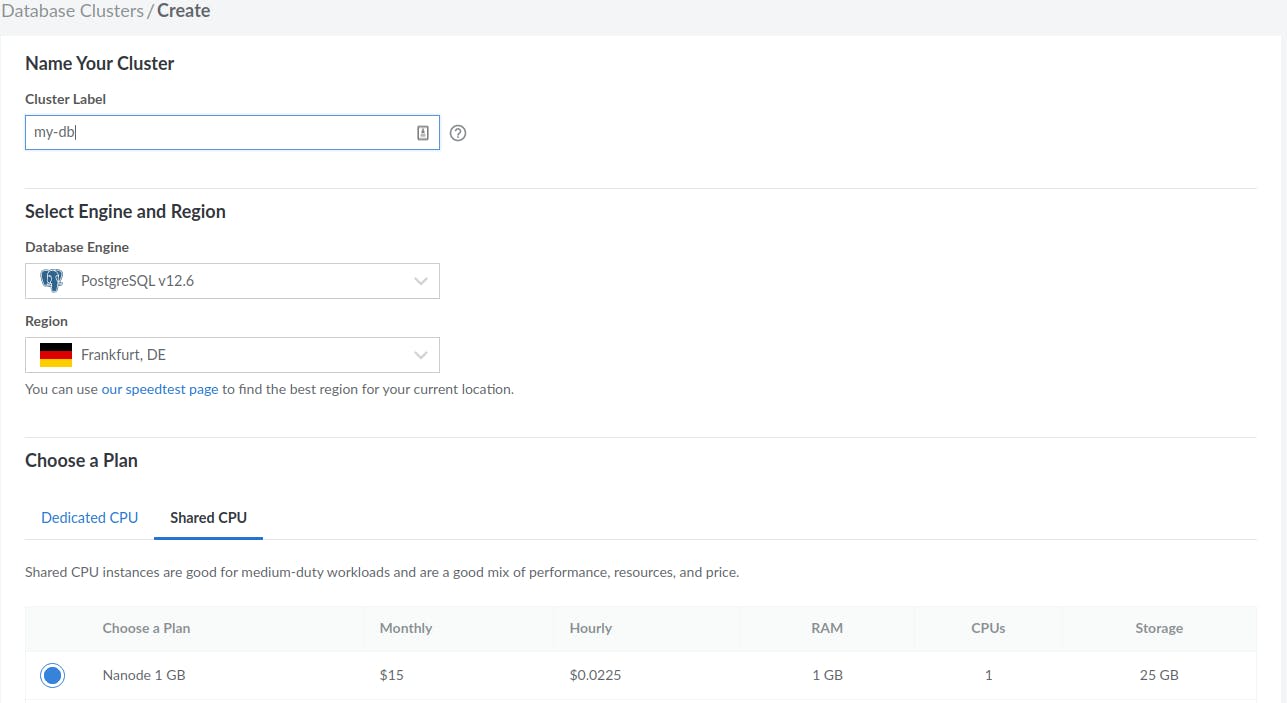
We will use the most basic shared CPU server, and provision it manually, you can also choose to provision it with Docker from the marketplace. Then we will use a managed Postgres database which we will access through Hasura.
- Server (Linode Nanode 1 GB. Shared CPU, 1 CPU, 1 GB RAM, 25 GB storage, $5/month)
- DB (Database Cluster Nanode 1 GB. Shared CPU, 1 CPU, 1 GB RAM, 25 GB storage, $15/month. We won't use High Availability)
- Storage (Linode Block Storage Volume, 10 GB, $1/month)
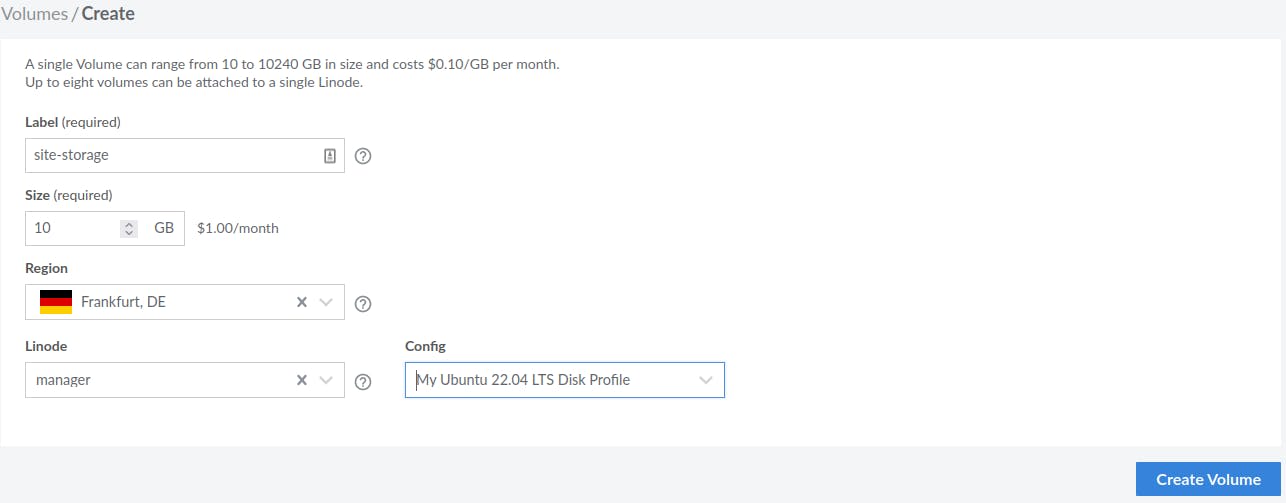
The storage will be mounted in our node, so after setting up, following the instructions that are displayed after creation there won't be any need for configuration, just to remember the mount path. (One thing to notice is that the last command in the configuration is to add inside /etc/fstab and not just copy and paste to console).
Server
It is an Ubuntu machine that runs Docker and uses fastify as a server to implement the manager.
Provisioning
First we will install Docker. Since we will have root ssh access, there is no need to prefix with sudo.
# Probably you already have all of these installed
apt-get update

apt-get install ca-certificates curl gnupg lsb-release

mkdir -p /etc/apt/keyrings

curl -fsSL https://download.docker.com/linux/ubuntu/gpg | gpg --dearmor -o /etc/apt/keyrings/docker.gpg

echo   "deb [arch=$(dpkg --print-architecture) signed-by=/etc/apt/keyrings/docker.gpg] https://download.docker.com/linux/ubuntu $(lsb_release -cs) stable" | tee /etc/apt/sources.list.d/docker.list > /dev/null

apt-get update

# Installing docker
apt-get install docker-ce docker-ce-cli containerd.io docker-compose-plugin
Then we need to get Postgres 12 image and test our connection to the db.
docker pull postgres:12

docker run --rm -it postgres:12 psql postgres://db-username:db-password@private-network-host/postgres
At the moment migrations need to be applied manually, so you will need to clone the repository. The idea is to have this as part of an image that will be redistributed ready to use.
cd /

# Repository will be cloned at /app
git clone https://github.com/migsar/tranquilo app

cd app
docker compose up graphql-engine postgres -d
Hasura
We need to configure migrations to be able to persist changes.
We need to run the console through the CLI to be able to get save the metadata information. Be sure to have graphql-engine and postgres services running.
curl -L https://github.com/hasura/graphql-engine/raw/stable/cli/get.sh | bash

# Move to Hasura's metadata dir
cd /app/hasura

# in project dir

hasura metadata apply
hasura migrate apply --all-databases
hasura metadata reload
We need to do three things before creating our first maps:
- Enable Hasura console.
- Set an admin password for the console.
- Set a default role for unauthenticated users.
The easiest way to do so is to go edit the docker-compose.yaml and enable console (not intended for prod). Just uncomment the line containing HASURA_GRAPHQL_ENABLE_CONSOLE and be sure it is set to "true".
Then uncomment HASURA_GRAPHQL_ADMIN_SECRET as well, and be sure to change the default password. Finally, it is a good idea to add a line to assign non-authenticated users an anonymous role, we will need that to allow queries. This is done by adding a line after the previous option containing HASURA_GRAPHQL_UNAUTHORIZED_ROLE: anonymous, be sure to follow the indentation.
Now you can restart the services for changes to take effect. Remember that this configuration allow us to access the console, but it is better to have it disabled in prod even if it is protected with a password. So, after doing changes you will need to comment or set to false the line for enabling the console and restart again.
# It is important to be in the same dir as our config file, although it is possible to pass the path to it as a parameter to the command
cd /app

docker compose down
docker compose up graphql-engine postgres -d
Creating the first maps
This can be done from the console, and we enable it for that reason, but at this point I want to introduce another tool that can come handy to communicate with GraphQL APIs. We will use Altair, just download it and it is ready to use, you need to write your API's endpoint in the top, it will be the same for all requests. If you have been following this guide in your local machine it is http://localhost:8080/v1/graphql.

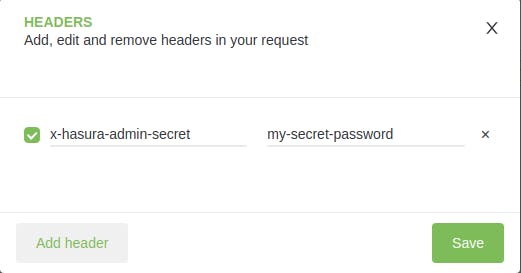
Then we need to set a special header that is related to the change we previously made in the config, at the top left of the app the first option is Set Headers, once you click it you can add x-hasura-admin-secret, be sure that the value coincides with the one you set for HASURA_GRAPHQL_ADMIN_SECRET.
We are now able to insert our first records. I created two default site's one for Gatsby and one for Astro, I'll talk about those in the next section, but for now let's add them.
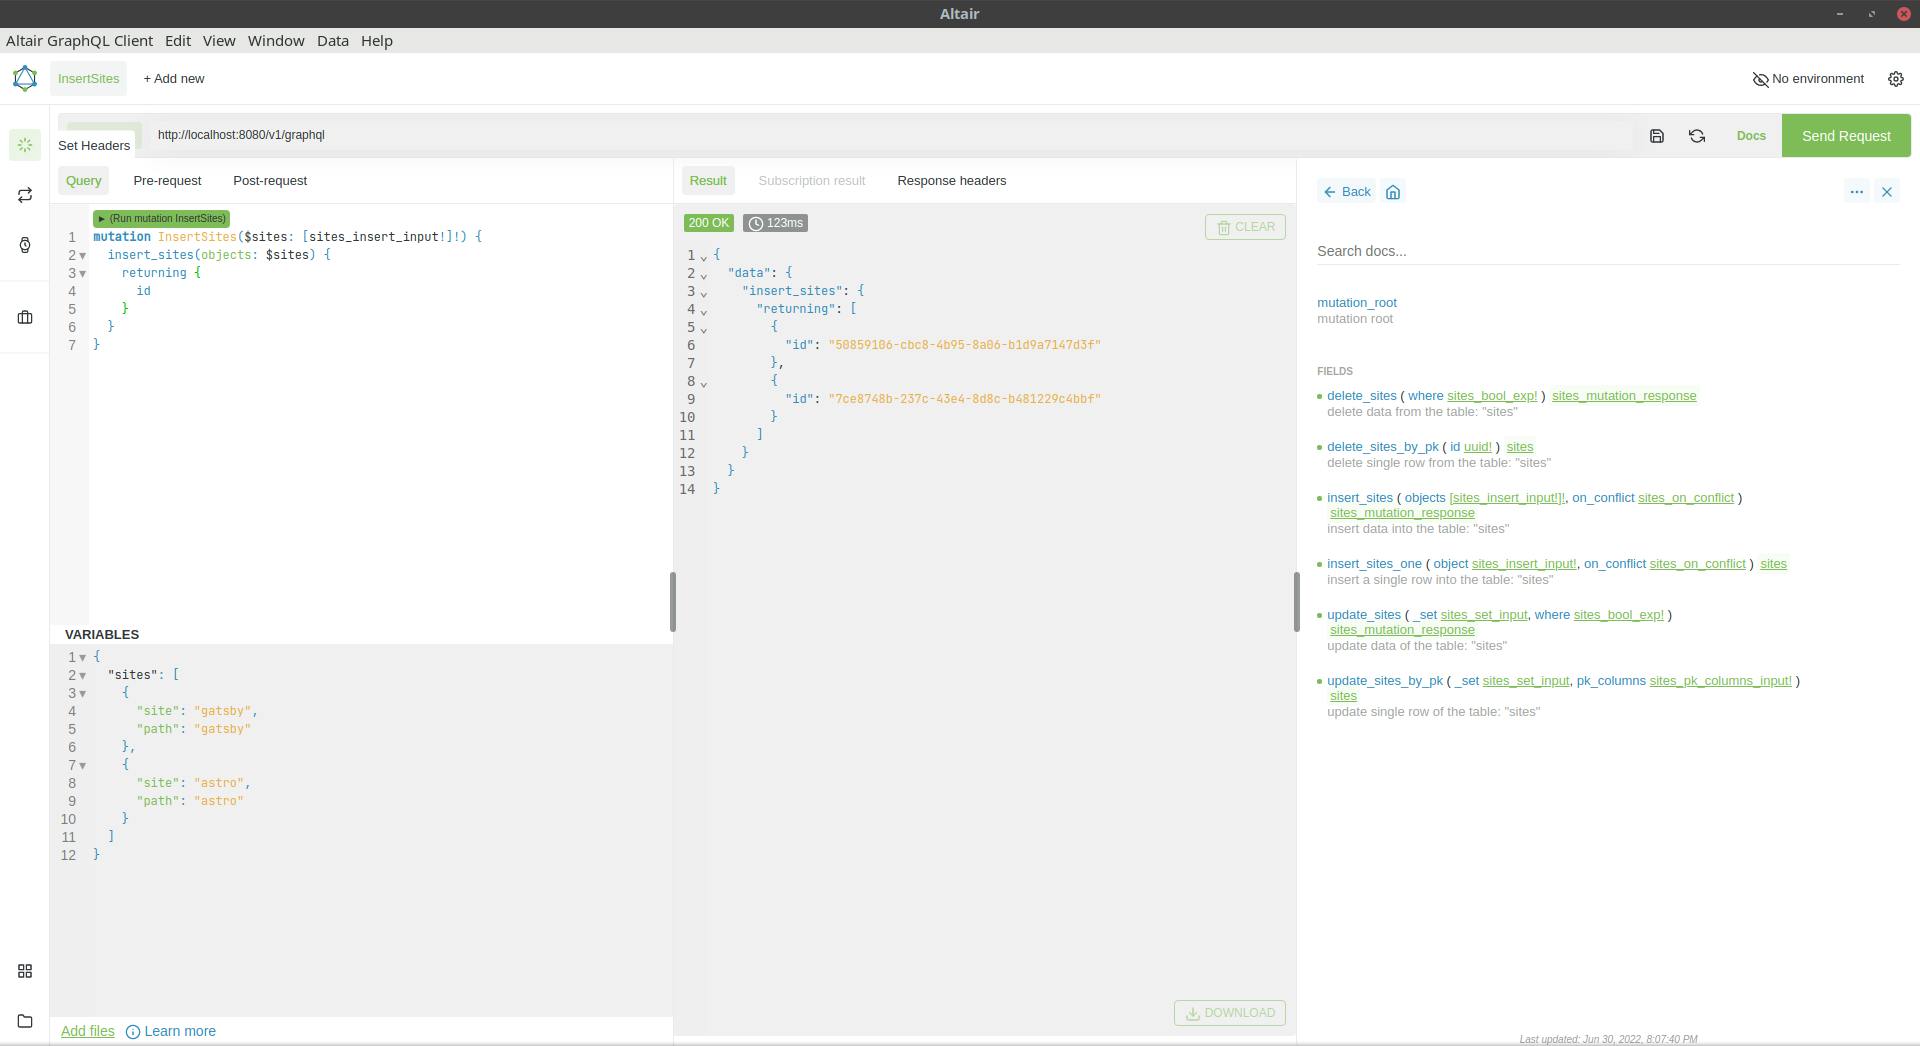
That's it we have our first sites in the db!
Here is the query as text and the payload (I hate when people include text as images):
mutation InsertSites($sites: [sites_insert_input!]!) {
  insert_sites(objects: $sites) {
    returning {
      id
    }
  }
}
{
  "sites": [
    {
      "site": "gatsby",
      "path": "gatsby"
    },
    {
      "site": "astro",
      "path": "astro"
    }
  ]
}
As you can see Altair is very convenient, and it is very similar to the API part of the console, both are based, conceptually, in the same project and both offer documentation and history so you don't need to type the queries you commonly use each time.
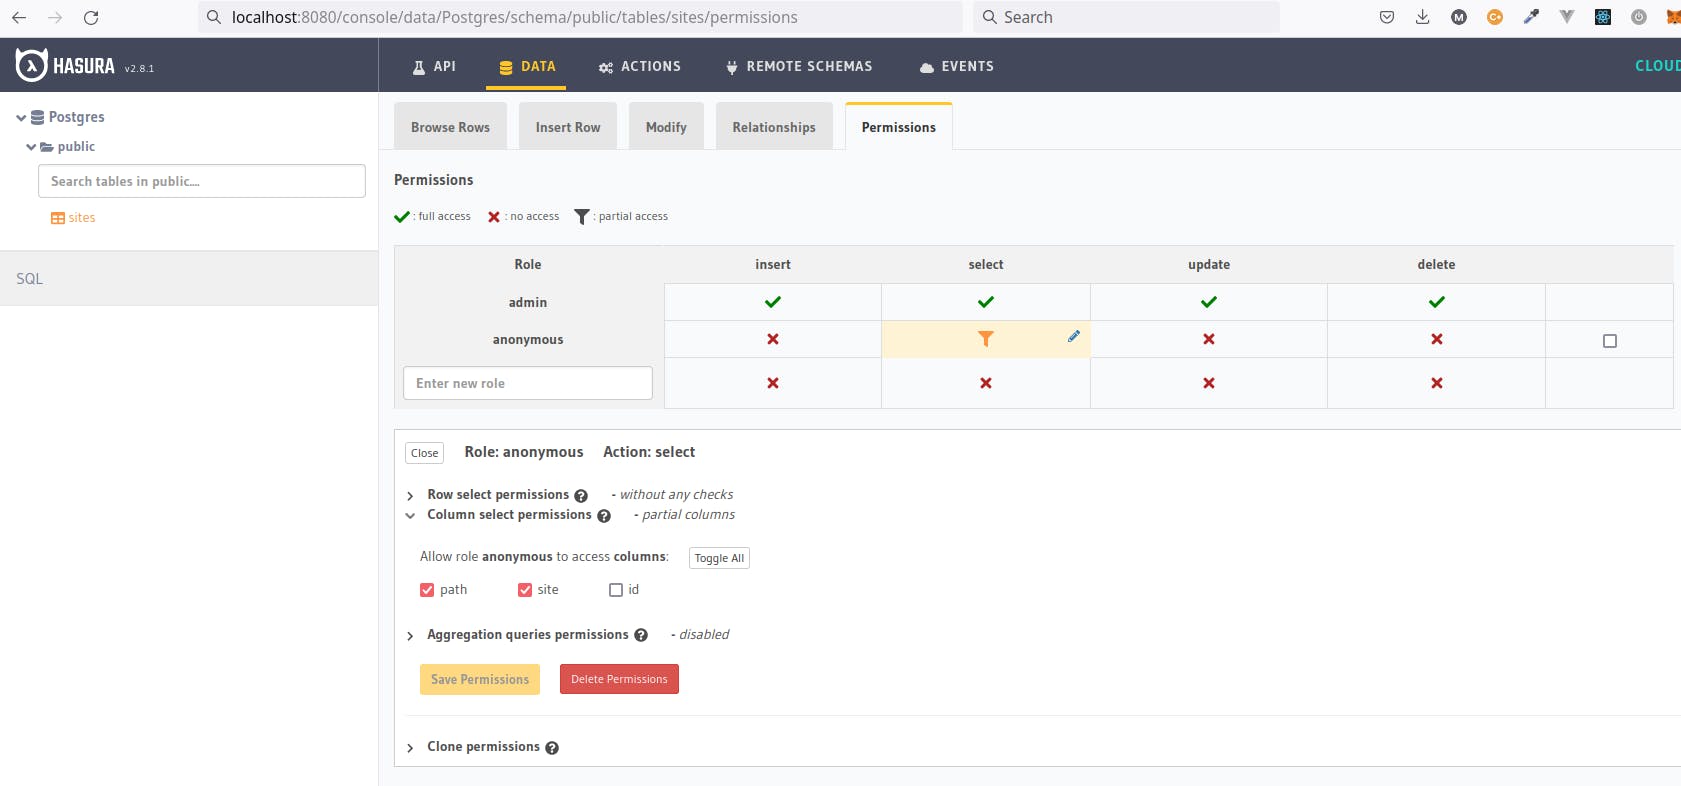
Now we will take a look at the console to set the permissions to query. We will need to open the console in a browser.
Be careful because sometimes browser change HTTP for the more secure HTTPS but our site is in HTTP and won't be found under HTTPS.
We need to go to the Data tab. Then create a new role anonymous and click select to set the permissions. In the columns section just select site and path then Save Permissions. There are a few things to notice here, there is the concept of roles, by default we are admin (because we entered the password) and we have access to everything. As we can see we have already a CRUD (Create, Retrieve, Update, Delete) structure in place for the table, although it is named a bit different. Finally, we can see we have very granular control for the permissions by being able to write checks for rows, select which columns are displayed or make a permission back-end only.
After this we are ready to go. Disable console and this time restart all services.
cd /app

docker compose down
docker compose up -d
There is one last step before being able to visit our first static site. Create some content.
Content
For this guide I decided to use two static site generators I particularly like: Astro and Gatsby. In both cases the basic site is super straightforward.
For Astro:
# After that follow their instructions
pnpm create astro

# or the name of your project
cd my-astro-project

pnpm build
For Gatsby:
# After that follow their instructions
pnpm create gatsby

# or the name of your project
cd my-gatsby-project

pnpm build
There is one little detail to consider, each framework have different destination for build. For Astro it is dist and for Gatsby it is public. Now we need to copy both of these directories to the place set in the docker-compose.yaml file, it might be misleading but it is not the SITES_PATH but the first part of the services -> app -> volumes string, before the colon, in my case - /sites:/data the /sites indicates the dir I have to copy the output.
The reason for this is that sites shouldn't be part of the container image and it was not as efficient to put them in an object storage service, so the best alternative seemed to be mounting that as a volume, this scales well for more advance configurations like Kubernetes (although the project is not ready yet) and it is easy to configure for block storage that is way faster.
That's it! Enjoy!
Conclusion
This project was born just a few weeks ago, in terms of code, but had been in conception for a long time. I am not sure why I decided this was a good time to use Linode for the first time and write this post. I know it is in a very early stage but I hope you can see the potential here. I really enjoy writing both this post and the code for the project, I used some technologies I really like and had not used for a while and also decided to give a try to swc for typescript to javascript compilation for node, it was a very good experience, I'll probably write a post about that soon.
I hope you had enjoy reading this post as much as I did writing it, if you are interested in these kind of things please feel free to follow me here or in Twitter as @migsarnavarro, and let me know what you think there or in the comments.
Features
- SEO friendly (Currently passively by completely delegating to the site generator)
- GraphQL API (By using Hasura)
Roadmap
- Advanced SEO
- Advanced analytics
- Dynamic content mapping
- Shared multi-tenant user authentication and support services (i18n, payment, comments, sharing, email)
- Support for storage (both block and object)
- Load and cost analysis.